이번에 HTML Editor를 사용해야될 일이 있었다.
여러가지 레퍼런스가 있었는데, 우리가 선택한 것은 React-Quill 이었다.
기술스택 선정이유는 따로 다루는 걸로 하고 프로젝트에 적용한 방법과 사용하면서 발생한 문제점을 공유하려고한다.
설치하기
https://github.com/zenoamaro/react-quill
GitHub - zenoamaro/react-quill: A Quill component for React.
A Quill component for React. Contribute to zenoamaro/react-quill development by creating an account on GitHub.
github.com
위의 링크에 들어가면, Quill을 활용해서 react-quill을 만든 라이브러리가 있다.
(다음부터는, Commit이 언제 마지막으로 됬는지 확인해라...)

npm install react-quill --save
적용하기
여기서 Nextjs에서 적용할 때 발생하는 문제가 있다. Nextjs 에서는 RSC / RCC 가 분리 되어 있다.
더욱이 App Router를 사용하면 Page.tsx에서 적용할 때 문제가 발생할 수 있다.
React-quill
React-quill은 브라우저 환경에서는 잘 작동하지만, 서버 환경에서는 DOM API에 의존하기 때문에 서버 사이드 렌더링 시에 문제가 발생한다. 그래서 Nextjs에서 이런상황에서 사용하라고 하는게 dynamic import이다.
https://nextjs.org/docs/pages/building-your-application/optimizing/lazy-loading
Optimizing: Lazy Loading | Next.js
Lazy load imported libraries and React Components to improve your application's loading performance.
nextjs.org
nextjs에서는 클라이언트 구성 요소 및 가져온 라이브러리 의 로드를 연기 하고 필요할 때 사용한다고 한다.
Dynamic Wrapper 사용하기
Nextjs 에서 제공하는 example을 보면
import dynamic from 'next/dynamic'

const DynamicHeader = dynamic(() => import('../components/header'), {
  loading: () => <p>Loading...</p>,
})

export default function Home() {
  return <DynamicHeader />
}
이걸 베이스로 React-Quill을 로드하면,
import React from 'react';

import dynamic from 'next/dynamic';
import ReactQuill, { ReactQuillProps } from 'react-quill';

interface ForwardedQuillComponent extends ReactQuillProps {
  forwardedRef: React.Ref<ReactQuill>;
}

const QuillNoSSRWrapper = dynamic(
  async () => {
    const { default: QuillComponent } = await import('react-quill');

    const Quill = ({ forwardedRef, ...props }: ForwardedQuillComponent) => (
      <QuillComponent ref={forwardedRef} {...props} />
    );

    return Quill;
  },
  { loading: () => <div>...loading</div>, ssr: false },
);

export default QuillNoSSRWrapper;
이런식으로 만들 수 있다.
Editor
'use client';

import React, { useMemo, useRef, useState } from 'react';
import ReactQuill, { Quill } from 'react-quill';

import { ImageActions } from '@xeger/quill-image-actions';
import { ImageFormats } from '@xeger/quill-image-formats';
import QuillNoSSRWrapper from './container';

import { formats, toolbarOptions } from './utils/options';
import { base64Handler } from './utils/imageHandler';

Quill.register('modules/imageActions', ImageActions);
Quill.register('modules/imageFormats', ImageFormats);

const HtmlEditor = () => {
  const [value, setValue] = useState('');
  const quillInstance = useRef<ReactQuill>(null);

  const imageHandler = () => {
    const input = document.createElement('input');
    input.setAttribute('type', 'file');
    input.style.display = 'none';
    input.setAttribute('accept', 'image/*');

    document.body.appendChild(input);

    input.click();
    input.onchange = async () => {
      const file: any = input && input.files ? input.files[0] : null;

      if (quillInstance.current !== null)
        base64Handler(quillInstance.current, file);

      document.body.querySelector(':scope > input')?.remove();
    };
  };

  const modules = useMemo(
    () => ({
      keyboard: { bindings: { tab: false } },
      imageActions: {},
      imageFormats: {},

      toolbar: {
        container: toolbarOptions,
        handlers: {
          image: imageHandler,
        },
      },
    }),
    [],
  );

  return (
    <QuillNoSSRWrapper
      forwardedRef={quillInstance}
      value={value}
      onChange={setValue}
      modules={modules}
      formats={formats}
      theme="snow"
    />
  );
};

export default HtmlEditor;
+ 추가로 적용한 기능
1. 이미지 Resize 및 이미지 Format
여러가지 라이브러리들이 존재했으나, 내가 적용한 라이브러리들은
import { ImageActions } from '@xeger/quill-image-actions';
import { ImageFormats } from '@xeger/quill-image-formats';
이거 두가지이다. 사용법도 간단해서 적용하기가 좋았다.
https://github.com/xeger/quill-image
GitHub - xeger/quill-image: Delightful editing of rich-text image embeds in the Quill editor.
Delightful editing of rich-text image embeds in the Quill editor. - xeger/quill-image
github.com
다만 여기서 주의해야될 점이 몇가지가 있는데,
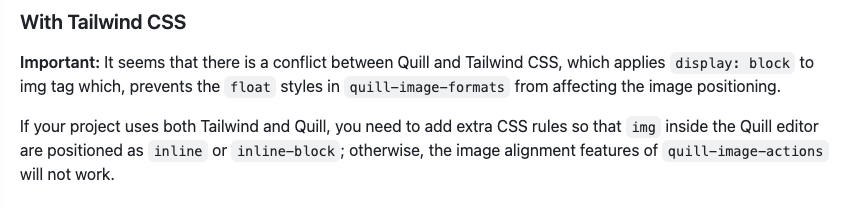
Tailwindcss를 사용하면, 위와같이 img태그의 display 속성을 inline 또는 inline-block으로 변경해야된다.
import React from 'react';
import ReactQuill from 'react-quill';

const formats = ['align', 'float'];
const modules = {
  imageActions: {},
  imageFormats: {},
  toolbar: [
    [{ 'align': [] }],
    ['clean']
  ]
};

export const Editor(): React.FC = () => (
  <ReactQuill
    formats={formats}
    modules={modules}
    theme="snow"
  />
);
또한 중요한 것은 format의 속성값들중 align, float를 적용해야 해당 기능들을 사용할 수 있다.
2. 이미지 핸들러
react-quill 에디터로 이미지를 첨부하면 base64로 인코딩된다. 변환을 거치지 않고 데이터를 전송을 하면, 경우 따라서
스트링 길이가 길어서 서버에 저장되지 않을 수 있다. 그래서 우리가 사용할려는 방식은 preSignedUrl을 이용해서 S3에 대한 권한 접근방식링크를 받고 직접 S3로 API 요청을 보내고 Url로 돌려받을려고 했다.

이러한 과정을 구현하기 위해서는 module 안에 있는 속성값을 추가해줘야 된다.
  const modules = useMemo(
    () => ({
      keyboard: { bindings: { tab: false } },
      imageActions: {},
      imageFormats: {},

      toolbar: {
        container: toolbarOptions,
        handlers: {
          image: imageHandler,
        },
      },
    }),
    [],
  );
위와같이 toolbar 안에 handler라는 객체를 추가하고, image 라는 key의 value값으로 imagehandler를 추가해 주면된다.
  const quillInstance = useRef<ReactQuill>(null);

  const imageHandler = () => {
    const input = document.createElement('input');
    input.setAttribute('type', 'file');
    input.style.display = 'none';
    input.setAttribute('accept', 'image/*');

    document.body.appendChild(input);

    input.click();
    input.onchange = async () => {
      const file: any = input && input.files ? input.files[0] : null;

      if (quillInstance.current !== null)
        preSignedUrl(quillInstance.current, file);

      document.body.querySelector(':scope > input')?.remove();
    };
  };
quillInstance를 이용해서 edtior에 접근해서 우리가 만들 이미지태그를 추가할 거고,
const presignedUrl = async (
  reactQuill: ReactQuill | null,
  input: HTMLInputElement,
) => {
  input.addEventListener('change', async () => {
    const file: any = input && input.files ? input.files[0] : null;

    const urlLink = await putPresignedUrl();

    if (presignedUrl !== null) {
      const url = await putUploadToS3({
        presignedUrl: urlLink,
        uploadFile: file,
      });

      if (url !== null) {
        const range = reactQuill?.getEditorSelection();

        if (range) {
          const editor = reactQuill?.getEditor();
          editor?.insertEmbed(range.index, 'image', url);

          reactQuill
            ?.getEditor()
            .setSelection({ index: range.index + 1, length: range.length + 1 });

          document.body.querySelector(':scope > input')?.remove();
        }
      }
    }
  });
};
preSignedUrl 함수를 통해서 이미지 정보를 Url 정보로 리턴해서 사용할 것이다.
사용하면서 발생한 문제점
원하는 기능을 다만들고 나서 editor가 있는 페이지에 대한 성능검사를 진행해봤다.


button에 대한 aria-label이 존재하지 않아 접근성 관련해서 문제가 발생했었다.
https://github.com/zenoamaro/react-quill/issues/663
Improved Accessibility · Issue #663 · zenoamaro/react-quill
Hello, This library is fantastic and our team thoroughly enjoys using it! As we are making efforts to move toward full accessibility support in our apps, we ran a "lighthouse" report in Chrome and ...
github.com
react-quill에서도 이러한 문제를 인식하고 있었으나, 업데이트가 되지 않았다... 눈물이 나네....
불행중 다행인것은 Quill에서는 해당문제 대해 인지했었고 업데이트까지 완료한 상태. 그래서 Quill로 갈아 타야되나 고민이 된다.
https://github.com/quilljs/quill/issues/2038
Suggestions for toolbar accessibility · Issue #2038 · quilljs/quill
There has clearly been some effort made to make the quill editor and toolbar keyboard-accessible. As it is, you can do pretty much everything Quill has to offer without a mouse 👍 In developing with...
github.com
뭐가 어찌됬건 다른 방법도 존재하긴한다. react-quill에서 제공하는 toolbar를 사용하지 않고 Custom 으로 toolbar를 제작하고
각각의 버튼에 aria-label를 추가해서 toolbar로 지정하면 되긴하는데, 이럴꺼면 이거 안썼지!!!

위와같은 문제도 발생하는데
https://github.com/quilljs/quill/issues/3891
Quill.js - Browser alert - Deprecated feature used · Issue #3891 · quilljs/quill
Browser is raising a warning regarding line 4274 in quill.js - I'm using latest version 1.3.7 **_this.domNode.addEventListener("DOMNodeInserted", function() { });** DOM Mutation Events, including D...
github.com
Quill 홈페이지에서는

여기 아저씨가 하는말로 봐서 업데이트 해줄꺼라는데 7월 30일날 배포할려나보다.
https://github.com/quilljs/quill/issues/3806
Latest Quill Release using deprecated DOMNodeInserted mutation event · Issue #3806 · quilljs/quill
The latest quill release is using deprecated mutation event DOMNodeInserted that will be removed/disabled from Chrome around July 2024. See https://chromestatus.com/feature/5083947249172480 Platfor...
github.com
비슷한 내용으로 이런것도 있다.
이걸로 봐서는... Quill을 사용해야되나 싶기도 하고..ㅎㅎ 더 좋은게 많아 보이긴하는데
어찌됬된 사용후기는 이러하다.